
War Dogs External
Installation Guide
Always disable Windows Defender and any anticheat software before running a loader.
Follow the setup steps in order, then log in to the loader and select your product.
- 1
Step 1: Prepare Your PC
- 1.Close any active anticheat services, such as Faceit or Vanguard
- 2.Disable Windows Defender real-time protection and any other antivirus before running the loader
- 3.If using dControl, extract the archive (Password: sordum), run dControl.exe as Administrator and select Disable Windows Defender
- 2
Step 2: Install Required Runtimes
Install the Visual C++ and Microsoft DirectX runtimes before opening the loader.
- 1.If you already have Visual-C-Runtimes.zip, extract it, right-click install_all.bat and select Run as Administrator
- 2.Alternatively, install the official Visual C++ Redistributable (x64) linked below
- 3.Download and install the Microsoft DirectX Runtime below
- 3
Step 3: Disable Vulnerable Driver Blocklist
Open CMD as Administrator and paste this command, then restart your PC after it says completed:
reg add "HKLM\SYSTEM\CurrentControlSet\Control\CI\Config" /v VulnerableDriverBlocklistEnable /t REG_DWORD /d 0 /f
- 4
Step 4: Download Your Loader
- 1.Open cheezit.life using the Download here button above
- 2.Enter your license key
- 3.Wait for your custom loader build to download
- 5
Step 5: Log In & Inject
- 1.Open the loader application
- 2.Log in with your existing account, or create a new account using your license key
- 3.Go to the Products page inside the loader
- 4.Select War Dogs External and click Inject
Common Fixes
Injection fails - retry your session
- 1.Log out and back in, then try injecting again
- 2.Launch the loader only once per session - multiple launches can invalidate your session
ESP feels slow or unresponsive
- 1.Reduce your in-game FPS cap and graphics settings
- 2.In Rust, go to Options → Screen → FPS Limit
ESP appears shaky
Disable Anti-Aliasing and NVIDIA DLSS in your game settings.
Download page or loader won't load
If the installation page or loader does not load, or asks for a VPN, install TunnelBear, enable it and try again.
Menu won't open - press the Insert key
The menu opens and closes with the Insert key on your keyboard. Press it once the software is loaded in game.
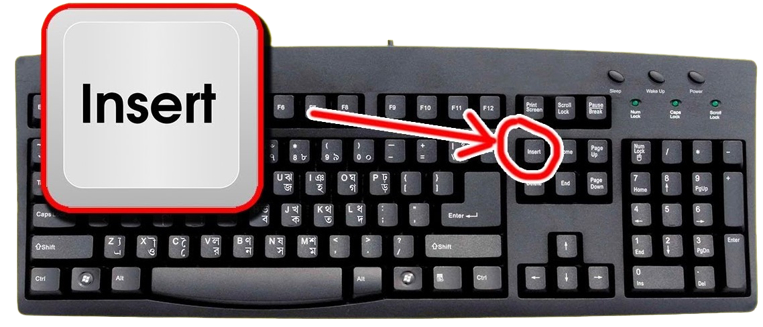
1. The Insert key on a standard keyboard No Insert key? Use the on-screen keyboard
Some laptops and compact keyboards have no Insert key. Use the Windows on-screen keyboard instead:
- 1.Press Win + R, type "osk" and hit Enter
- 2.Click the Insert key on the on-screen keyboard while in game
1. Click Insert on the on-screen keyboard Loader doesn't open - add the host file
If the loader does nothing when you open it, Windows is missing the host file it needs:
- 1.Download the host file from the MEGA link below
- 2.Press Win + R, type "drivers" and hit Enter
- 3.Open the "etc" folder
- 4.Paste the host file inside, then run the loader again
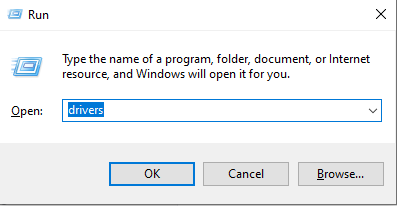
1. Win + R, then type "drivers" Loader crashing or not connecting - use Warp
If the loader crashes, hangs or can't reach the server, your network is likely blocking it. Cloudflare WARP fixes this:
- 1.Download and install WARP from https://1.1.1.1/
- 2.Open the system tray (arrow near the clock) and click the WARP icon
- 3.Toggle WARP on and wait until it says Connected
- 4.Run the loader again and repeat the inject step
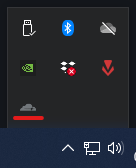
1. Open WARP from the system tray 
2. Wait until WARP says Connected Game crashing - check Core Isolation
Core Isolation and Memory Integrity stop games from crashing while the software is loaded:
- 1.Open the Windows Search bar
- 2.Type Core Isolation and open it from the results
- 3.In the Windows Security window, locate Memory Integrity
- 4.Turn Memory Integrity On
- 5.Restart your PC if Windows prompts you to
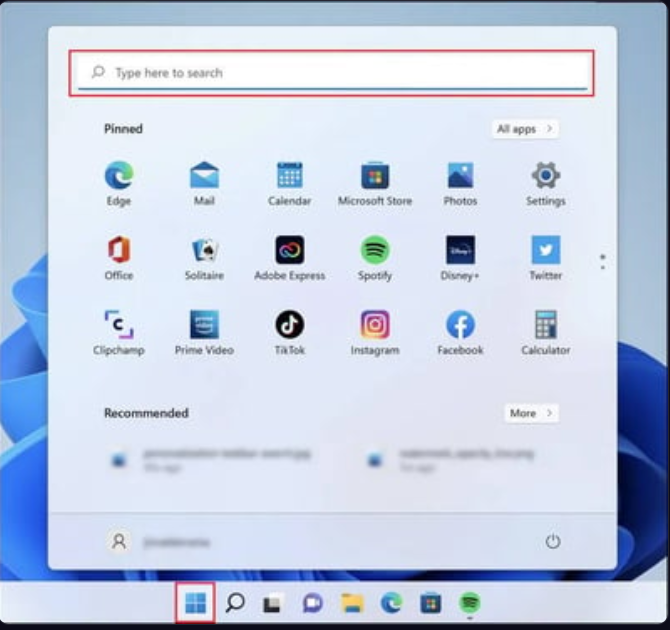
1. Search for Core Isolation 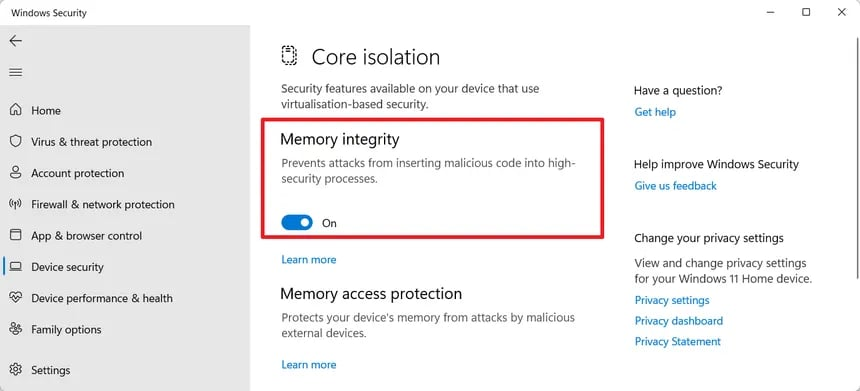
2. Turn Memory Integrity On Menu or visuals not centered - set scaling to 100%
Windows display scaling above 100% pushes the menu and visuals off-center:
- 1.Open Windows Settings
- 2.Go to System → Display
- 3.Under Scale and layout, set "Change the size of text, apps, and other items" to 100%
- 4.Set your game to Windowed Fullscreen / Borderless
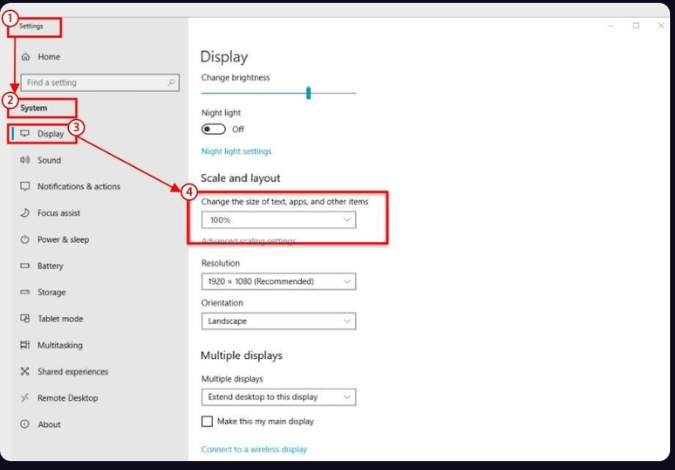
1. Set display scaling to 100%
Still stuck?
- •Still stuck? Open a ticket in Discord with a screenshot of the error.